dc Syntax for Vim
Note: this article originally appeared on http://brhefele.brainaxle.com. Links may still point there, formatting may be off, this may all get fixed.
I use dc as my primary calculator for day-to-day needs. I use other calculators as well, but I try to largely stick to dc for two reasons – I was raised on postfix (HP 41CX, to be exact) and I’m pretty much guaranteed to find dc on any *nix machine I happen to come across. Recently, however, I’ve been expanding my horizons, experimenting with dc as a programming environment, something safe and comfortable to use as a mental exercise. All of that is another post for another day, however – right now I want to discuss writing a dc syntax definition for vim.
The first amazing thing, to me, was that there was not already a syntax definition for dc! I have thoughts on the matter – dc is a fairly obscure, archaic tool that I’m sure is rarely used; those who do use it likely use it in interactive mode rather than writing code for it; languages like Python (etc.) provide great platforms for math coding as well as interactive use. Yet there are syntax definitions for far more obscure languages (LOLCODE), and dc is perfectly suited for quick math scripts. But I digress, I don’t really care that nobody has come up with a syntax definition for dc, it just surprises me. So I figured I’d roll my own. Not a difficult task, but a few things made it easier for me…
Vim has wonderful documentation, but it’s almost too straightforward, lacking in examples, etc. I find it easier to start with a little tutorial – like this one – to wrap my head around what I’m getting into. So that was a good start, but I quickly realized a problem – syntax keywords are expected to be just that – words. dc largely ignores whitespace, and treating every command as a word (adding a space between each command) would nearly double the amount of typing necessary. At this point I realized I wouldn’t be able to use any syntax keywords, and would instead need to do everything through regex.
Sometimes it helps to compare your strategy to that of an existing, similar product. To that end, I decided to check out Mathias Panzenböck’s syntax definition for brainfuck, another language in which whitespace between commands is unimportant. The brainfuck definition, unsurprisingly, was all done through regex. So, new problem, Vim’s regex support is weird at best – determining what does/doesn’t need escaping is a complete crapshoot. Fortunately, at some point, I read about Vim’s very magic mode. So that makes things pretty easy. Then I came to the point where I had to figure out how to handle strings.
Because macros in dc are stored in strings, and are in fact completely indistinguishable from other strings, a problem arises. I want my macros to be what Vim calls ‘transparent’ – that is, the commands inside them should be properly highlighted. Strings, on the other hand, should be their own highlight, all one color (and with spellchecking enabled, for my uses). First I had to make some rules for myself – any string followed immediately by an execute command is obviously a macro, but that’s not the only case. So, I looked at my own code and realized that whenever I’m writing a macro, I give it its own line – just the macro and its save command. So, while this is meaningless to dc, it’s meaningful to me, and I needed something meaningful to apply.
The final trick was in getting this to work. If I have a string defined as a string, and I have this arbitrary scenario defined as a ‘macro,’ and I want my macro to be transparent, well, all that’s going to show through is the string! Then we’re back to square one… The trick I used, and I’m not sure if there’s an easier way (and I’m not sure if there needs to be – this is probably a rather rare situation) was to set the contains parameter of my macro to NONE, telling it that it contains no other highlights, and then manually adding every other highlight except for string. I was also able to leave out comment and shell command, since they eat up that follows until newline.
The final file, which I actually need to make one change to, can be previewed here, and can be downloaded on vim.org.
Fade to Black
Note: this article originally appeared on http://brhefele.brainaxle.com. Irregular formatting is due to stylesheet changes, and may eventually be corrected.
Remember when Polaroid stopped making Time Zero, and then they stopped making instant film altogether? And all of our SX-70s and Daylabs became useless? And then remember when some people undertook the impossible project of buying up a Polaroid factory and all the equipment, with the promise of making new film, calling it ‘The Impossible Project?‘ Well if you don’t remember, now you’re up to speed on what this is all about.
If I’m not mistaken, there have been two phases to The Impossible Project. The first was using old genuine Polaroid chemicals to make new films. The second, which just recently launched, uses new (for Polaroid at least) chemistries, resulting in Polaroids as we’ve never seen before. I recently burned through the last remaining Time Zero that I had, and decided to order two packs of Fade To Black, one of the films out of the first phase. I have today shot my first shot using this film. All of the following photos link to their respective flickr pages…
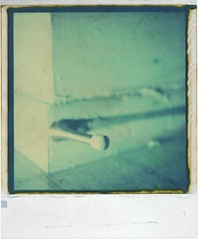 Fade To Black uses a curious chemistry which keeps on developing until, in about 24 hours, the whole frame has developed itself to total blackness. Unless the photographer intervenes! Seen here is the final product of my first shot – nothing more will happen to this photo. The manual gives two methods of intervention – dry & wet. The key is basically just getting the film the hell away from the chemicals. I chose to use the wet method – peeling the film off of the backing, washing all the nasties away, and ending up with a positive image on film.
 Seen here was the first moment when I looked at the film and thought, ‘aha! I have one complete version of a photo.’ But of course it’s never that easy, deciding when to terminate something which is constantly changing. So I kept the scalpel away, and scanned the image, then got back to watching. You can see that at this point, which was just a couple of minutes into developing, the end result (still on the backing foil) is pretty similar to how the final positive appears on a white back. It has enough dynamic range that you can really start to feel what’s white, what’s shadowy, and colors are tending toward cool, blues.
 After a few minutes, my image was much darker already, and the colors had shifted rather dramatically as well. Highlights were warm, reddish, while shadows remained cool, tending almost toward green now. I think this may have been my favorite iteration of the three – the shadows were nice and deep, and although the highlights were a bit too dim, the cross-processed look to the colors made up for it. I gave it a couple more minutes before pulling out the scalpel and gutting the sheet. This was tricky, and messy, but it would have been far worse. Washing it was not bad, but drying was also tricky, as I’m not really set up to dry any sort of film anymore! I ended up hanging the wet film from my shower curtain rod using a jury-rigged paperclip/binder clip contraption.
All in all, I think my first experiment with Fade To Black was a success, and I look forward to my remaining 15 experiments. I plan to try pushing the exposure wheel over to white, and using a Flashbar to get some very strong highlights in the near future. I feel like I have a better understanding of the time involved with the film, the color characteristics, and the variation between the film sitting on its backing, and the bare film. I have to give Impossible Project the utmost respect for the work they’ve done thusfar, and I look forward to getting in on some of their new Polaroid packs as well (particularly, PX100).
The luck, the find
Note: this article originally appeared on http://brhefele.brainaxle.com.

haunted sky – click for flickr page.
Above is one of my photos which has drummed up a bit more interest than most of my work. This makes sense – it is a much more interesting photo than my usual fare. The sky is bizarre and enchanted, and why? Are we looking at strange clouds? Smoke from a bonfire? Contrails from an alien craft? The answer lies beneath, another photo from the series:
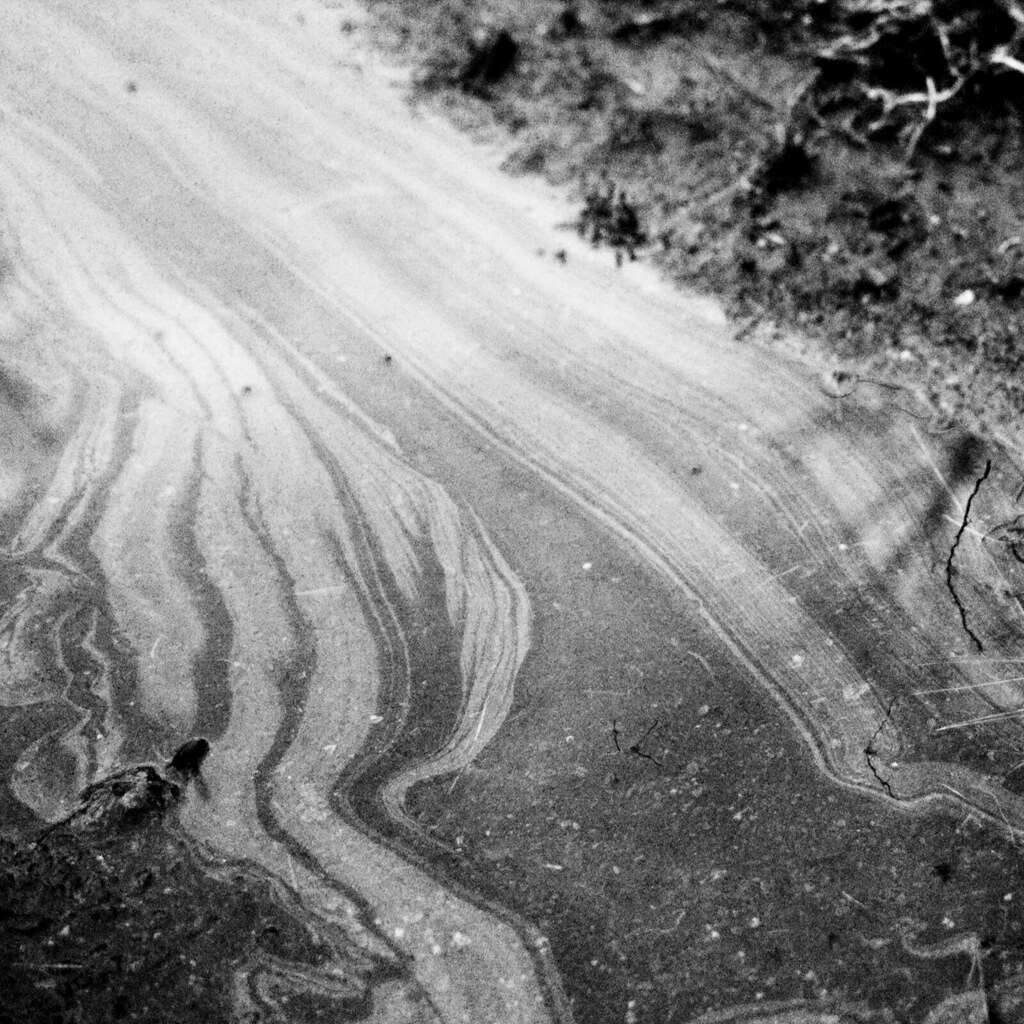
oil, puddle. – again, click to go to flickr.
The reality was that I stopped and squatted down to shoot the latter photo – just the simple lines of the oil slick. But then I noticed something, the reflection of a fence and some trees. As I got them in focus, the oil streaks cut out into the background, giving the appearance of surreal, dreamlike clouds.
This is all well and good, but the fact is that I only noticed it by mistake. I saw something else, and I got lucky and found this as a result. There’s a lesson to be learned, or perhaps two… Luck is a very valuable thing. I feel like it shouldn’t be, like I should have seen the interesting scene first. But the truth is that had I seen that first, I may still have needed luck to find something even better. I can strive to always spot the most interesting part of a scene right away, or I can just take it as it comes. Sometimes you must realize that you can’t force inspiration, it must come to you. And (to find another lesson learned) inspiration comes from anywhere and everywhere – even the nastiest, oiliest puddle.