Fade to Black
Note: this article originally appeared on http://brhefele.brainaxle.com. Irregular formatting is due to stylesheet changes, and may eventually be corrected.
Remember when Polaroid stopped making Time Zero, and then they stopped making instant film altogether? And all of our SX-70s and Daylabs became useless? And then remember when some people undertook the impossible project of buying up a Polaroid factory and all the equipment, with the promise of making new film, calling it ‘The Impossible Project?‘ Well if you don’t remember, now you’re up to speed on what this is all about.
If I’m not mistaken, there have been two phases to The Impossible Project. The first was using old genuine Polaroid chemicals to make new films. The second, which just recently launched, uses new (for Polaroid at least) chemistries, resulting in Polaroids as we’ve never seen before. I recently burned through the last remaining Time Zero that I had, and decided to order two packs of Fade To Black, one of the films out of the first phase. I have today shot my first shot using this film. All of the following photos link to their respective flickr pages…
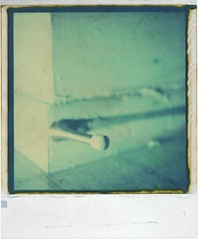
 Fade To Black uses a curious chemistry which keeps on developing until, in about 24 hours, the whole frame has developed itself to total blackness. Unless the photographer intervenes! Seen here is the final product of my first shot – nothing more will happen to this photo. The manual gives two methods of intervention – dry & wet. The key is basically just getting the film the hell away from the chemicals. I chose to use the wet method – peeling the film off of the backing, washing all the nasties away, and ending up with a positive image on film.
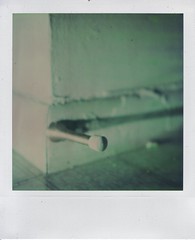
 Seen here was the first moment when I looked at the film and thought, ‘aha! I have one complete version of a photo.’ But of course it’s never that easy, deciding when to terminate something which is constantly changing. So I kept the scalpel away, and scanned the image, then got back to watching. You can see that at this point, which was just a couple of minutes into developing, the end result (still on the backing foil) is pretty similar to how the final positive appears on a white back. It has enough dynamic range that you can really start to feel what’s white, what’s shadowy, and colors are tending toward cool, blues.
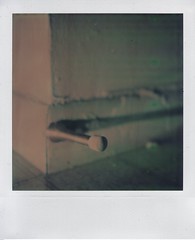
 After a few minutes, my image was much darker already, and the colors had shifted rather dramatically as well. Highlights were warm, reddish, while shadows remained cool, tending almost toward green now. I think this may have been my favorite iteration of the three – the shadows were nice and deep, and although the highlights were a bit too dim, the cross-processed look to the colors made up for it. I gave it a couple more minutes before pulling out the scalpel and gutting the sheet. This was tricky, and messy, but it would have been far worse. Washing it was not bad, but drying was also tricky, as I’m not really set up to dry any sort of film anymore! I ended up hanging the wet film from my shower curtain rod using a jury-rigged paperclip/binder clip contraption.
All in all, I think my first experiment with Fade To Black was a success, and I look forward to my remaining 15 experiments. I plan to try pushing the exposure wheel over to white, and using a Flashbar to get some very strong highlights in the near future. I feel like I have a better understanding of the time involved with the film, the color characteristics, and the variation between the film sitting on its backing, and the bare film. I have to give Impossible Project the utmost respect for the work they’ve done thusfar, and I look forward to getting in on some of their new Polaroid packs as well (particularly, PX100).