Moersch Easylith as Film Developer
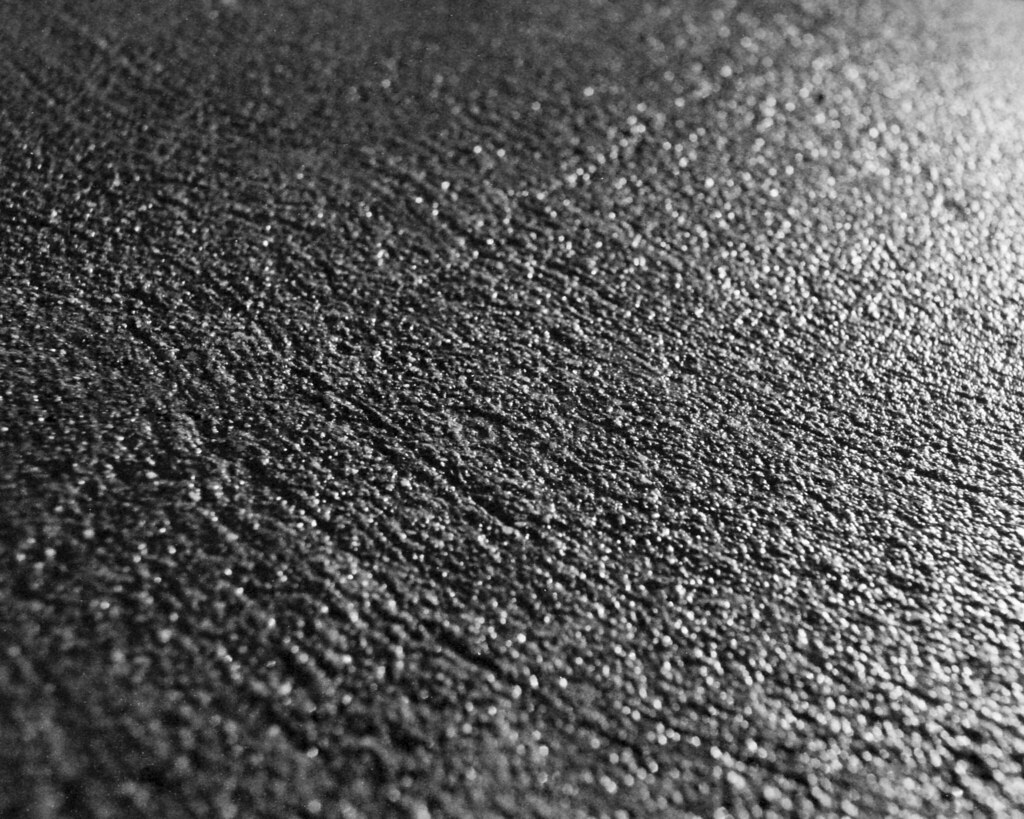
 ilford panf+ developed in moersch easylith paper developer.
For as long as I’ve been interested in photography, I’ve been particularly interested in the aesthetics of high-contrast photography. We were supposed to shoot 400TX in high school, I shot D3200 and made contact prints off of contact prints on the highest graded contrast paper I could find. Now, I find even 400TX to be too fast for my daily pursuits, and I work a hybrid system – developing film, but going digital for post-processing and printing. Digital contrast curves are designed to not be too harsh, but still don’t quite compare to grabbing that contrast in a chemical reaction. So, recently, I decided to try an experiment using lith developer designed for paper on film.
The lith process is a high-contrast process used in the graphics world, for line art and document copy type work. It is a process done in the print stage, using special lith developer, and generally working off of a prepared contact-printed large format lith negative. Lith developers can be rather complicated, coming in as many as five-part systems. Carefully choosing your ratios can dramatically change the end result, which allows for a lot of creative control, but also introduces a lot of room for failure. Moersch makes a two-part lith developer designed to take a lot of the guesswork out of the process, called Easylith. Since these developers are not designed for standard negative film, a lot of guesswork was already going to be involved, so for my experiment, I thought Easylith would be a good start. It’s also rather affordable – $14 at Freestyle Photo works out to just over a dollar a roll at the ratio I’m working in, as a one-shot. And that’s for the smallest (most expensive by volume) set of bottles available.
 my first roll was extremely underdeveloped/underexposed.
With no guidance from the internet, my first roll was a failure. Negatives were incredibly thin, and when I was able to pull out an image, there was no major pop in contrast. I shot at box speed, used 5cc each of part A and B Easylith, developed at 25c for 10 minutes, agitating vigorously every 20 seconds. When developing paper in Easylith, one is recommended to extend development times, and agitate thoroughly, something I attempted to replicate on the film side. One shot that I had overzealously bracketed came out with decent density, and showed me that I was on the right track, I just needed to go harder. I shot my second roll at a 2 stop (give or take) pull, and used 8cc each of part A and B Easylith, agitating every 15 seconds. These negatives were very dense, and many of them very usable, yielding just the results I had hoped for.
The ‘give or take’ on my 2 stop pull is an important detail. The meter on the Pentax MX only goes down to EI/ISO 20. I was shooting PanF+, rated at 50, which is about a 1.5 stop pull when shot at EI 20. I compensated manually, but in several cases, had a gut instinct to pull even further, and so I compensated even further. My gut instinct was generally wrong, and many of my negatives were impossibly dense. For the sake of experimentation, this is good. I now know to meter for about a 2 stop pull, and trust that I’ll get an image, even if it doesn’t necessarily have the characteristics that I want.
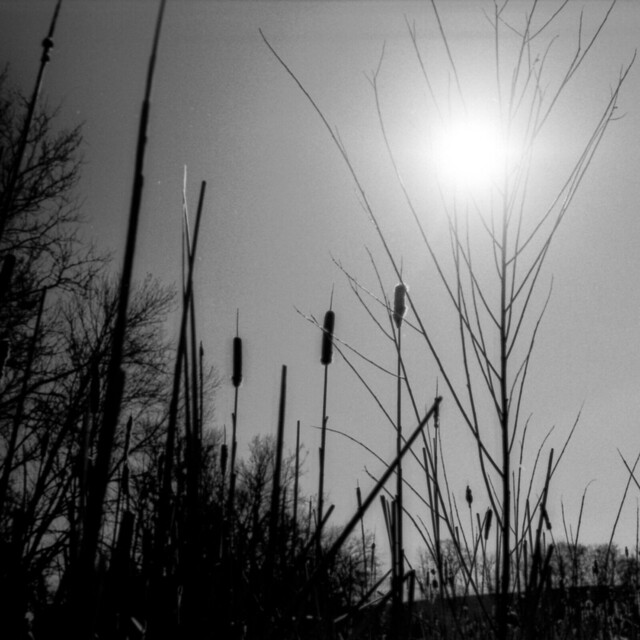
 contrasty scenes like this backlit playground equipment really bring out the developer’s properties.
So, how then, to encourage that unreal contrast that I so desire? Well, shooting PanF+ was a smart choice, being a relatively contrasty film to begin with. Any of the stranger document films that Adox, Agfa, Rollei, &c. put out should give even stronger results. Shooting contrasty scenes, and in contrasty light certainly helps as well. In scanning, my hardware and software blasted such strong light through the negatives, and tried so hard to make them ‘normal,’ that tweaks were necessary in post-processing to bring back the contrast that shines through so brilliantly on the negatives themselves. Finally, I will continue to tweak the process, based on the effects that such tweaks would have if I were doing a normal lith process. This means messing with agitation (which encourages development of highlights), ratio of dev:water, and ratio of a:b. So far, I’m very happy with my results, and it’s only taken me one wasted roll. If anyone out there tries this process, I’d love to hear/see the results, so drop me a line here or on flickr.
 easily my favorite shot off of roll two.
Pentax Super Program
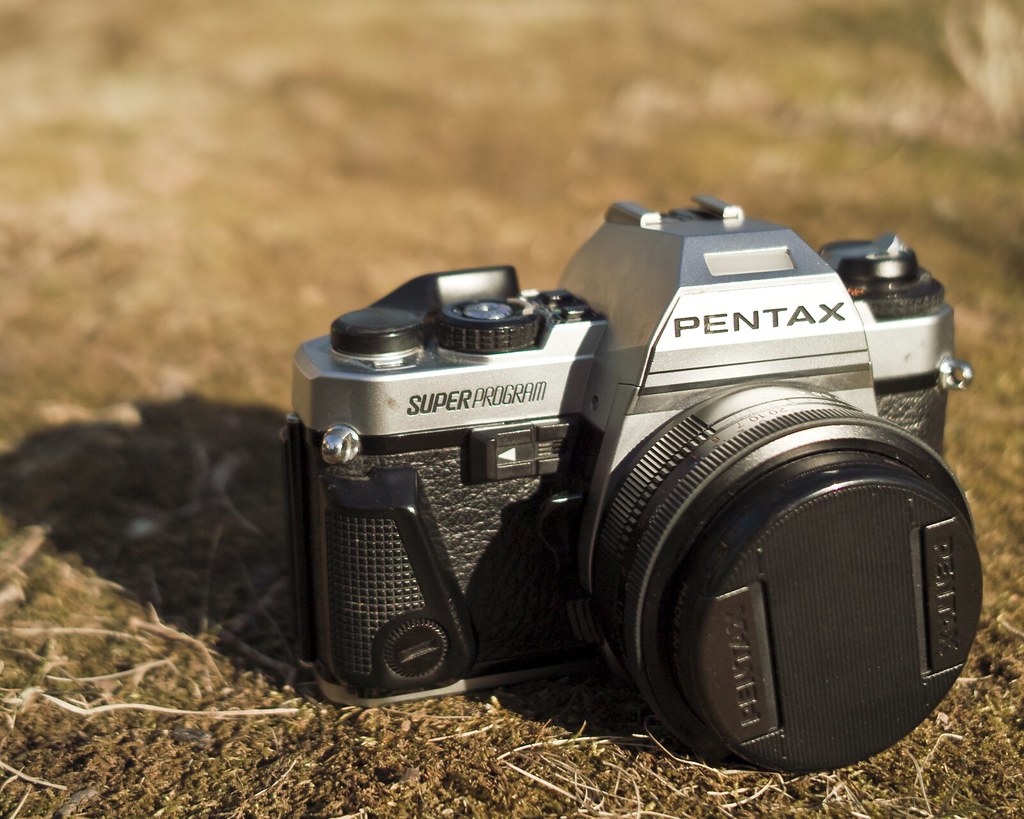
Recently, in replacing my beloved Pentax MX, I also happened upon a Pentax Super Program. Some might disagree, but I would consider the Super Program to be the last classic camera Pentax ever made. It’s not the last manual focus body they ever made, nor even the last manual advance. But it’s the last with a classic look, a classic heft, and relatively few/simple settings. It’s not a ‘pro’ body by many definitions – indeed, at the time it was released, a fully electronic shutter with no mechanical fallback was a dangerous proposition. But it does have four exposure modes, a solid meter, decent finder readout, and features that creatives yearn for, like DOF preview.
A fully electronic camera with a wealth of automatic modes is not typically what I look for in a camera. Primarily, I shoot fully manual bodies, only because these tend to be tough, fully mechanical bodies as well. In reality, shooting manual based on your camera’s meter is no different than shooting Av or Tv (assuming you have adequate compensation), or Program (assuming you have program shifting). I don’t have a snobbish ‘artists only shoot M’ opposition to automatic cameras, I just don’t own many and therefore don’t use them often. This is all to say that the Pentax Super Program is not really ‘my type’ of camera — and I was shocked at how much I love shooting it.
 the main control knob, buttons for changing shutter speed, and shutter speed readout lcd.
My ideal interface to a fully automated camera is a normal shutter speed dial, with the addition of an Auto setting, and exposure compensation right on the dial. My least ideal interface is the PASM dial, with actual settings moved to the background, and likely a handful of extra silly program modes tacked on the knob. The Super Program is somewhere in between. It has a main control knob with Auto and Manual settings — these dictate the shutter operation only. Setting a manual aperture on the lens, or setting the lens to its ‘A’ setting dictates how the aperture operates. So, for fully manual, pick an aperture and a shutter speed (main dial on ‘M’); for aperture priority, pick an aperture and set the main dial to Auto; for shutter priority, pick a shutter speed (main dial on ‘M’) and set the lens to ‘A;’ and for Program mode, set both the lens to ‘A’ and the main control dial to Auto.
The main control dial also has dedicated settings for 125 (TTL flash sync speed), bulb, and shutter lock. Next to the knob are two buttons, used for adjusting the shutter speed in ‘M’ mode. Ask someone if they think you should get a Super Program (or, an older ME Super), and this button interface and lack of a proper knob will inevitably come up. It’s definitely different, and I’m certainly more used to a knob. But, in practice, shutter speeds can be changed quite rapidly with the button interface, and it’s really very usable. The finder has two LCD segments for information. In most modes, one side displays shutter speed and the other aperture. In metered manual mode, however, you lose aperture info for the sake of the meter (±EV readout). If you want to shoot metered manual primarily, you’re better off with an MX — more finder info, and the LED meter is more immediately recognizable.
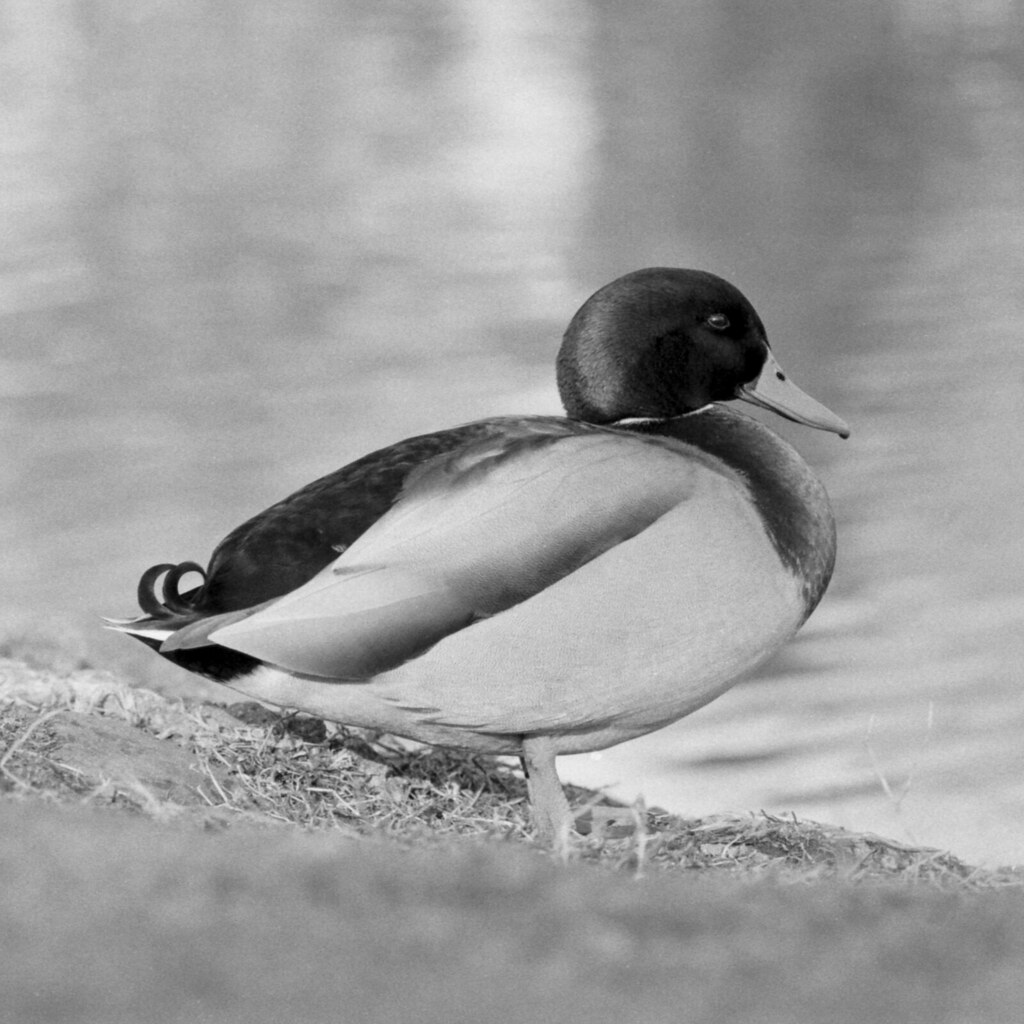 duck, shot in aperture priority mode with a rikenon 135/2.8 on the pentax super program.
The half-press switch that activates the meter is incredibly flaky on my example. While this is inconvenient, fortunately if the meter is not already on, the camera does meter right before the shot is taken as well. This means that even if I can’t get a readout beforehand, I will get a properly exposed shot if I’m in an automatic mode. Exposure compensation on the right-hand side is not particularly odd, but I definitely prefer it to be built into the main shutter dial. The camera is not particularly small, being somewhere in between a K-series and an M-series. Film loading is convenient, using the Magic Needles take-up spool. While the camera feels overall very sturdy, the film advance is incredibly cheap and plasticky feeling. The electronic shutter (15″ to 1/2000″) makes a beautiful noise when fired. There is a backlight for the finder display, but it’s a bulb, and consumes an enormous amount of power from the 2 SR76 cells.
All in all, the Super Program is a really fun, easy to use body. I still prefer my MX, but I have no qualms about grabbing for the Super Program. I’ll probably have it cleaned up at some point to get the switches working (not just the half-press switch — my backlight switch isn’t the greatest, and the self-timer switch barely works). But even with incredibly flaky switches, the camera is very usable. I probably won’t bring it out on many night shoots — long bulb exposures will likely take a toll on the batteries. But it’s a great camera to have around, especially for the relatively low prices they demand.
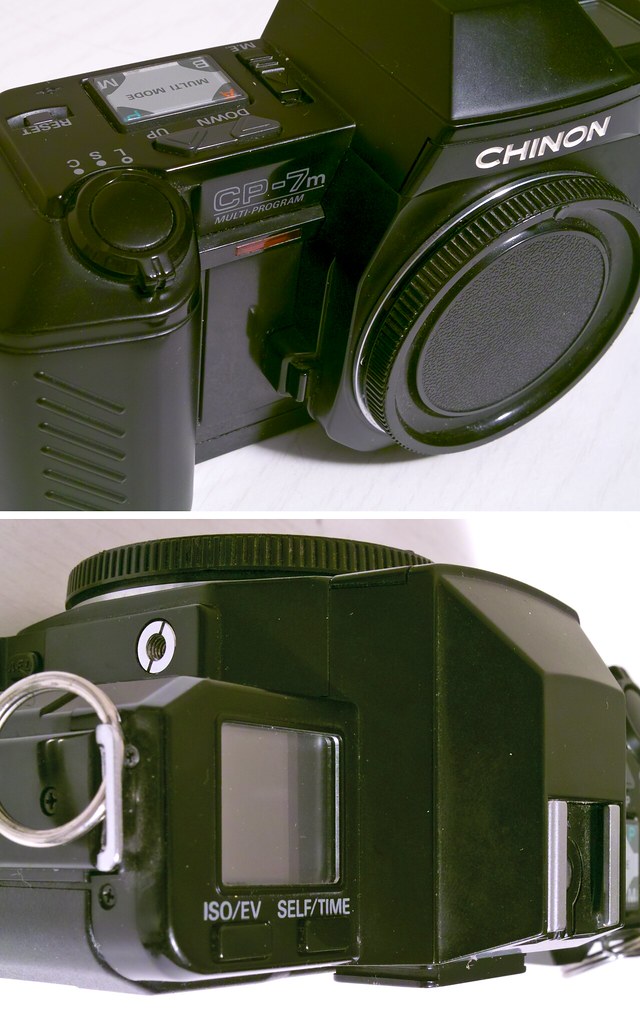
Chinon CP-7m
This photo is part of my photo reference set on Flickr. Detailed notes accompany the photo itself.
Chinon was never one of the major players in the photography game, their name not as recognizable as Canon, Nikon, or Pentax. But they made some very interesting bodies throughout the years, including the CP-X, CP-5, CP-6, CP-5s, CP-7m, and CP-9AF. All of these have some neat features, and one very interesting trick up their sleeves — the ability to operate in program mode with any K-mount lenses (not just lenses with A settings — in fact, they tend to underexpose with A lenses due to a change in the K mount spec). While I’m still hoping to find a bargain on one of the first four CP cameras in the list above, this write-up will deal with the CP-7m. The CP-9AF is identical, except that it has electrical contacts to communicate with a couple of primitive auto-focus lenses from Chinon. The CP-9AF also provides electronic focus confirmation with manual focus lenses, auto-bracketing, and TTL flash (with dedicated Chinon flash units).
The CP-7m has one feature which I really hate — inbuilt motor drive. I’ve only owned two other SLRs with motor drive, and it annoyed me on both of them as well. I never shoot continuously, and even the quietest of motor drives are far louder and more irritating than a manual advance. Motor driven cameras also require more power, and are generally bulkier. For these reasons, the CP-7m could never be my go-to camera. But, to use a tired cliché, the CP-7m is a bit of a Swiss Army Knife, with plenty of niche features that will have me grabbing for it at the bottom of the camera pile every now and again.
The first neat thing, for a night shooter like myself, is how the camera handles bulb mode. Bulb has its own dedicated mode (there’s a four-way mode switch, much like the typical PASM, but without shutter priority and with bulb we actually have a PABM) which is a nice UI decision. Unlike a lot of cameras from the era of how-many-electronics-can-we-cram-into-this-body, the CP-7m takes a standard, old-fashioned cable release, and thus does not require a costly, hard-to-find, proprietary release — already a good start for long exposures. In the basic bulb mode, the display on the left-hand side keeps a count of the length of the exposure. This is shown in second intervals up until 60 seconds, and then minutes until 90 minutes. In fact, anything related to time follows the same scheme, which will come up several more times in this write-up, so make a mental note — everything time related can be done up to 90 minutes, with one-second precision up to a minute and one-minute precision after. While in minute display, the minute indicator on the display blinks every second. Unfortunately, the display is not backlit, so this counter may not be too incredibly helpful at night (the aforementioned CP-5, etc., beep every five seconds for the first minute, and every minute after in bulb mode, probably handier at night). Still, keeping track of bulb exposures seems like a no-brainer, though many cameras lack it.
Aside from normal, hold-down-the-release bulb mode, the CP-7m also offers what Chinon describes as a time mode. This isn’t the traditional time mode wherein the shutter is hit once to open and again to close. Rather, this is an extended bulb mode where you can tell the camera how long you want the shutter to be left open. This essentially means that if you don’t need to meter, your shutter speeds run from 1/2000 second to 90 minutes. Pretty exciting. While in this mode, the display counts down from your set time, and the exposure is cancelable at any time.
a six minute exposure using the bulb timer built into the cp-7m.
The self-timer has the same time range as the bulb modes. This, by itself, is kind of silly — an hour and a half self-timer has pretty limited utility. But the trick is this — set the motor drive to continuous, add a locking cable release, and you have a rather flexible intervalometer. Interval shooting was the one reason I almost held onto my Pentax PZ-1, though using the feature on the PZ-1 was much more of an ordeal than on the CP-7m. The only real issue with interval shooting on the CP-7m is that since it’s based on a self-timer, there is no initial shot. That is, the first frame to fire fires after the determined interval. For most short intervals this won’t matter, and for most long intervals a shot can simply be fired before switching to interval mode. Still, this could be an issue. Continuous (and therefore interval) mode works with the multiple exposure feature as well, so interval shots can all be performed on a single frame if so desired.

‘self portrait over the course of an hour’ achieved by leaving the chinon in multiple exposure mode, and shooting six frames at ten minute intervals.
The last thing that I really appreciate about this camera, even if it’s a pretty minor thing, is the power source. If you’re going to make me load a camera up with batteries, it’s nice to have options. And, the CP-7m gives me two options without even needing a stupid external grip — 1 pricy 2CR5 or 4 easy-to-come-by AAs. I tested the body with Sanyo Eneloops, and it does work perfectly fine with the 1.2V nominal output of NiMh cells.
Aside from all the little things that make this camera really stand out, it has some perfectly good specs. Speeds on the vertical-travel shutter range from 1/2000 to 8 seconds, and sync is 1/125. User interface is uncluttered and logical (although the buttons have a mushy feel about them). Tripod thread and lens mount are both metal, despite the camera being overall a bit plasticky. The back is removable in the normal manner, though the manual makes no mention of other available backs. The take-up catch has a similar release, though I haven’t actually found what it does. The camera operates without the back on, which could be useful for some DIY projects, I suppose. The finder is not half-bad, offering shutter speeds and metering through a bar of LEDs, though no display of aperture. Focus aids include a horizontal rangefinder split surrounded by a relatively fine microprism collar. Film speed is set via DX, with manual override available (32-5000 ISO). When DX-coded film is used, the ISO button turned into an EV± button, and the display keeps a persistent warning when anything other than ±0EV is set. The meter is of the wonderfully responsive silicon blue variety, and is center-weighted. Finally, AE lock is available via a small button to the right of the lens.
I loaded my CP-7m up with a half-roll of Kentmere 100, and plan to try some long exposures and interval shots in the coming weeks. Results will be posted here and on flickr.
Check out the Chinon group on Flickr. There’s also a nice group dedicated to K-mount cameras of all sorts.