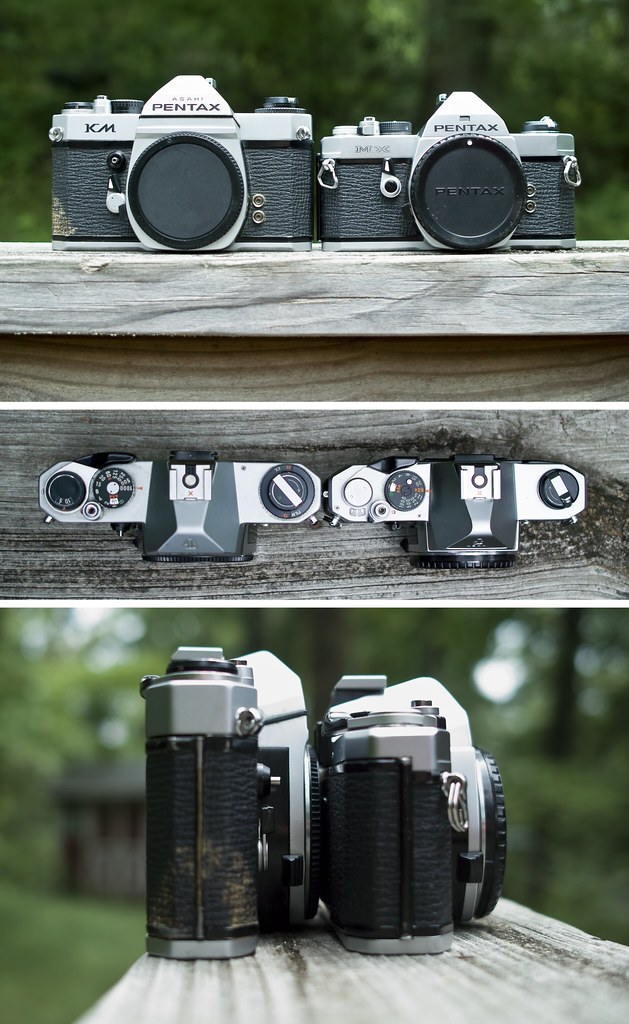
Size comparison: Pentax K vs Pentax M bodies
This little article is part of my photo reference set on Flickr. Clicking the photo above will take you to the photo page on Flickr, with quite a few notes about the cameras on the photo itself.
When I was looking to move from a Pentax KM to a Pentax MX, I was unable to find any good photos comparing the sizes of the two series of bodies. So, after I received my MX and before I gave my KM to a friend, I shot them side-by-side at some straightforward angles in case this information is ever valuable to anybody else.
As far as other layout differences between the K-series and the MX (other M-series have even different layouts, being Av bodies), few are notable. K-series bodies either have no indicator (K1000), or a spin wheel to describe what sort of film is in the body. I prefer either of these to the memo holder of the MX, wherein one slides part of the box the film came in. I’ve never used these memo holders, I think they’re ugly and I think they’re awkward. Depth of field preview has been merged into the self-timer lever on the MX, which is a nice UI simplification. The ISO adjustment wheel (outer ring of shutter speed dial) on K-series bodies is of the sort that one lifts and rotates to adjust. On the MX, a tiny button on the shutter speed dial must be depressed, and then the outer ring turned to adjust the ISO. Which, unfortunately, only goes to 1600. Setting it is a real pain, though, compared to the old method… and I have tiny fingers! Finally, one of the biggest differences is match diode in the MX vs. match needle in the K-series. Personally, I choose diodes… Less precise, but also less fragile. Love the finder on that camera, and the LEDs are the icing on the cake.
Check out the Pentax MX group on Flickr.
Vivitar V3800N
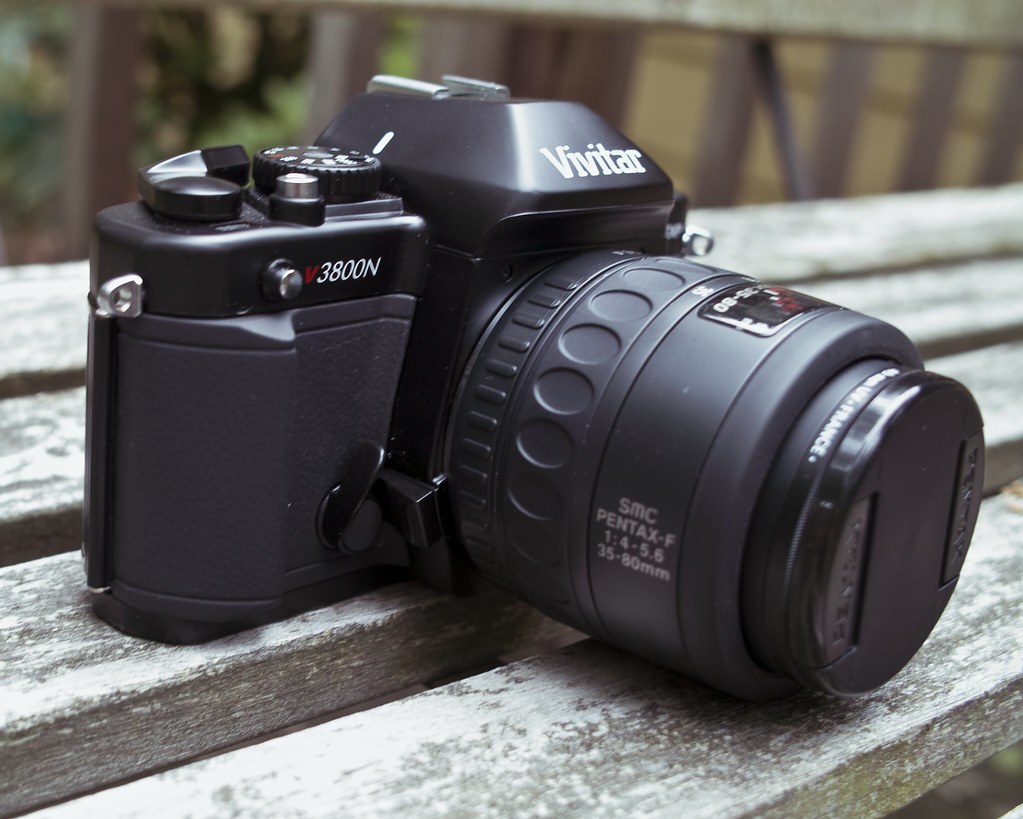
Generally speaking, there are a few things I really look for in an SLR. Small size and light weight are very high priorities, as is fully manual operation via a mechanical shutter. At some point in my quest for a camera meeting these requirements, I ended up with a (Cosina-made) Vivitar V3800N, a plasticky, fully mechanical/manual K-mount camera with one interesting trick up its sleeve — it’s still being made and sold. It comes in two kits, either a zoom of some sort that didn’t interest me, or a 50/1.7 prime. I opted for the 50mm, and use it as a rainy-day, don’t-care-if-it-gets-wet-lens. I keep a nasty feeling (but incredibly light) Pentax 35-80 zoom on the V3800N. The camera now lives in the trunk of my car as a camera to lend to friends on impromptu photo-walks and for times when I would otherwise miss a shot for not having grabbed a camera when I left the house.

vivitar v3800n, pentax smc-f 35-80/4-5.6, kodak tri-x
i don’t ordinarily bring my good cameras poolside…
I can’t guarantee that the Vivitar will remain my ‘trunk camera’ forever. If I collect enough Pentax MXes, one of those could easily fill the position. If I overcome my fear of electronic shutters, a Super Program or P30t would also suffice. But for now, it’s the V3800N, for all its qualities and flaws. Starting out with the good — this camera is really light. This, of course, comes at the expense of being largely constructed of plastic, and likely not up to the torture tolerance of a K1000. As far as functionality, the camera scores pretty high. It gets points for its diagonal split rangefinder spot, coarse microprism collar, depth of field preview, and mirror lock-up on self timer. It has a multiple exposure feature, which it prominently advertises on the front of itself — something I have yet to use. Shutter is a vertical-travel Copal Square ranging from 1-1/2000, with flash sync at 1/125.
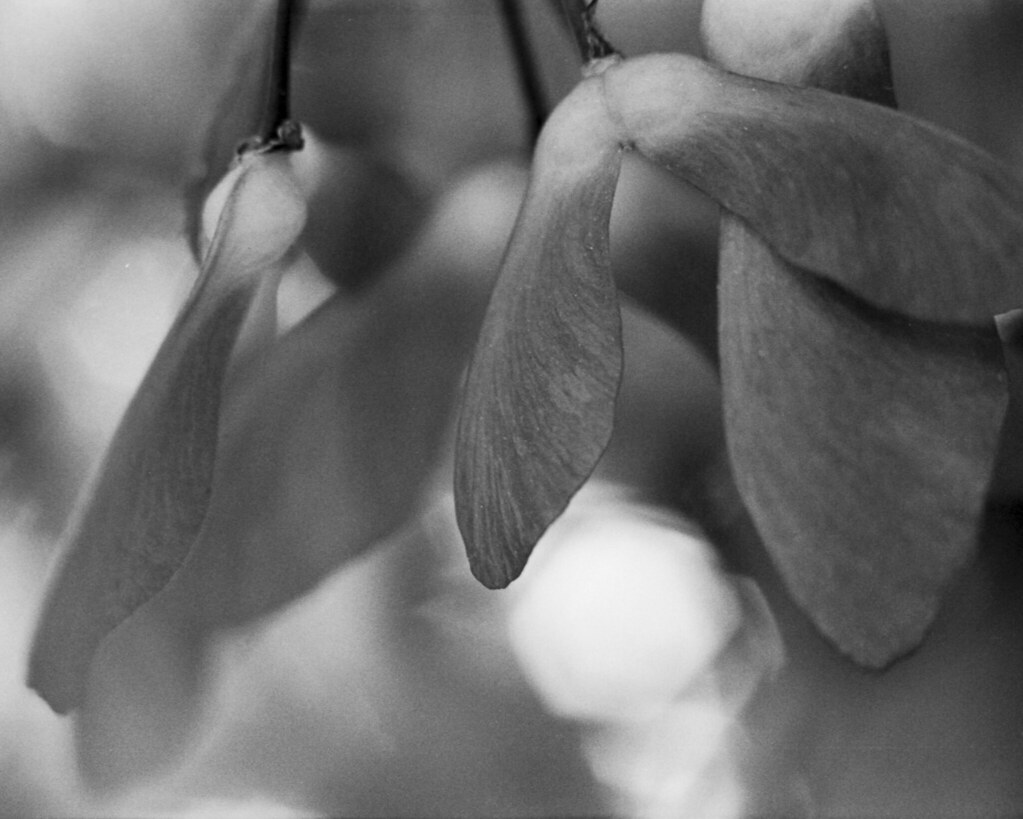
vivitar v3800n, 50/1.7 through extension, kodak tri-x 400
the kit lens is nothing special, but still a decent performer
The V3800N has a lot of nice features, but it’s still not a camera I would be quick to recommend. The plasticky feel is a bit hard to get over — I wouldn’t even begin to describe the camera as ‘solid.’ The match diode metering is nice (my preference over match needle), but only reads in three segments versus, say, the five LEDs in a Pentax MX. The film advance doesn’t feel too pleasant, and it doesn’t ratchet, which feels like a weird omission. The tripod thread is plastic, which I really don’t feel good about. Plastic threads repeatedly mating with metal threads is not a situation which inspires confidence in me. Finally, I had the meter straight-up fail during one of the few actual dedicated shoots I went on with the camera. The meter turned on, and responded to light, but was not linking with the lens or something. Fidgeting with the ISO setting eventually cleared it up, but this was not a great feeling from a brand new camera.
The Vivitar V3800N is not a horrible camera, and it is nice to see a fully manual, mechanical film SLR still being produced. At the price I imagine used ones go for, it would be a no-brainer backup camera that one would not mind if it got smashed to pieces. Rather than buying new, however, one would be better off finding a used classic K- or M- series Pentax which would almost certainly run more reliably for less money.
Check out the Vivitar V3800N group on Flickr. There’s also a general K-mount users group worth checking out. Finally, in reference to the Pentax ZX-M/MZ-M, Lewis Collard sings the praises of light, plasticky cameras.
Fade to Black
Note: this article originally appeared on http://brhefele.brainaxle.com. Irregular formatting is due to stylesheet changes, and may eventually be corrected.
Remember when Polaroid stopped making Time Zero, and then they stopped making instant film altogether? And all of our SX-70s and Daylabs became useless? And then remember when some people undertook the impossible project of buying up a Polaroid factory and all the equipment, with the promise of making new film, calling it ‘The Impossible Project?‘ Well if you don’t remember, now you’re up to speed on what this is all about.
If I’m not mistaken, there have been two phases to The Impossible Project. The first was using old genuine Polaroid chemicals to make new films. The second, which just recently launched, uses new (for Polaroid at least) chemistries, resulting in Polaroids as we’ve never seen before. I recently burned through the last remaining Time Zero that I had, and decided to order two packs of Fade To Black, one of the films out of the first phase. I have today shot my first shot using this film. All of the following photos link to their respective flickr pages…
") Fade To Black uses a curious chemistry which keeps on developing until, in about 24 hours, the whole frame has developed itself to total blackness. Unless the photographer intervenes! Seen here is the final product of my first shot – nothing more will happen to this photo. The manual gives two methods of intervention – dry & wet. The key is basically just getting the film the hell away from the chemicals. I chose to use the wet method – peeling the film off of the backing, washing all the nasties away, and ending up with a positive image on film.
Fade To Black uses a curious chemistry which keeps on developing until, in about 24 hours, the whole frame has developed itself to total blackness. Unless the photographer intervenes! Seen here is the final product of my first shot – nothing more will happen to this photo. The manual gives two methods of intervention – dry & wet. The key is basically just getting the film the hell away from the chemicals. I chose to use the wet method – peeling the film off of the backing, washing all the nasties away, and ending up with a positive image on film.
") Seen here was the first moment when I looked at the film and thought, ‘aha! I have one complete version of a photo.’ But of course it’s never that easy, deciding when to terminate something which is constantly changing. So I kept the scalpel away, and scanned the image, then got back to watching. You can see that at this point, which was just a couple of minutes into developing, the end result (still on the backing foil) is pretty similar to how the final positive appears on a white back. It has enough dynamic range that you can really start to feel what’s white, what’s shadowy, and colors are tending toward cool, blues.
Seen here was the first moment when I looked at the film and thought, ‘aha! I have one complete version of a photo.’ But of course it’s never that easy, deciding when to terminate something which is constantly changing. So I kept the scalpel away, and scanned the image, then got back to watching. You can see that at this point, which was just a couple of minutes into developing, the end result (still on the backing foil) is pretty similar to how the final positive appears on a white back. It has enough dynamic range that you can really start to feel what’s white, what’s shadowy, and colors are tending toward cool, blues.
") After a few minutes, my image was much darker already, and the colors had shifted rather dramatically as well. Highlights were warm, reddish, while shadows remained cool, tending almost toward green now. I think this may have been my favorite iteration of the three – the shadows were nice and deep, and although the highlights were a bit too dim, the cross-processed look to the colors made up for it. I gave it a couple more minutes before pulling out the scalpel and gutting the sheet. This was tricky, and messy, but it would have been far worse. Washing it was not bad, but drying was also tricky, as I’m not really set up to dry any sort of film anymore! I ended up hanging the wet film from my shower curtain rod using a jury-rigged paperclip/binder clip contraption.
After a few minutes, my image was much darker already, and the colors had shifted rather dramatically as well. Highlights were warm, reddish, while shadows remained cool, tending almost toward green now. I think this may have been my favorite iteration of the three – the shadows were nice and deep, and although the highlights were a bit too dim, the cross-processed look to the colors made up for it. I gave it a couple more minutes before pulling out the scalpel and gutting the sheet. This was tricky, and messy, but it would have been far worse. Washing it was not bad, but drying was also tricky, as I’m not really set up to dry any sort of film anymore! I ended up hanging the wet film from my shower curtain rod using a jury-rigged paperclip/binder clip contraption.
All in all, I think my first experiment with Fade To Black was a success, and I look forward to my remaining 15 experiments. I plan to try pushing the exposure wheel over to white, and using a Flashbar to get some very strong highlights in the near future. I feel like I have a better understanding of the time involved with the film, the color characteristics, and the variation between the film sitting on its backing, and the bare film. I have to give Impossible Project the utmost respect for the work they’ve done thusfar, and I look forward to getting in on some of their new Polaroid packs as well (particularly, PX100).